Category Archives: Interior Wood Staining

Interior Staining – Alder Wood – Method

IMG_1058
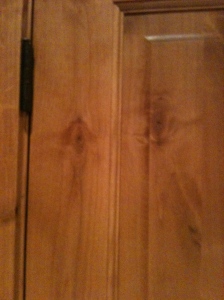
Lighter “toned” Alder Wood
IMG_1004
Dark Alder – Method 1
Alder is the most prevelant wood species in our mountain community. The dark knots and variable wood grain lends for a rustic outdoor look. There is more than one way to stain and finish semi-hard woods like the Alder species. It depends on the depth and tone of the stain color. Here are the two methods we use on a regular basis and a few different clear finishes that can be applied.

Our first method is used on more of a regular basis. Always work up stain samples on scrap wood, it will save huge headaches later.
1. Sand the wood with the grain using 220 sandpaper. Sand by hand in order not to get those swirls from a palm sander.
2. Stain – One coat with a wiping stain and remove within 5 minutes. The longer the stain sits the darker the stain penetrates. A penetrating stain can also be applied in which will increase this effect. We prefer wiping stain due to the control and shorter open time and ease of wiping.
3. Dry 24 hours.
4. Apply a waterborn sealer – up to 3 very light coats (spray – small tip – low pressure). Allow to dry and sand with 220 between coats.
5. Apply waterborne lacquer or polycrylic top coats (2-3). Light sand between coats.
6. Allow to dry. Fill nail holes with custom matched wood putty and wipe smooth. Stain pens and artist brushes can be used to seal the holes and help match the color.
7. Re-set and install hardware.

Our second method is used on very specific stain colors, which can be a bear to match. Lighter stain colors turn out the best. Use a good custom matcher at your paint store. Be sure the matcher at the paint store is apt at matching stains. Be sure he uses multiple toner coats, conditioner and the right top coat finish so you know the end result.
This method can be tedious and the results are apparent. This method is also used on new furniture and very nice hard-wood pieces.
1. Sand the wood with the grain using 220 sandpaper. Sand by hand in order not to get those swirls from a palm sander.
2. Condition wood. Follow manufacturers instructions. Be sure to use an ample amount and certain areas may need additional coats. Apply first stain coat before conditioner dries.
3. Stain Coat 1 (toner) – One coat with a wiping stain and remove within 5 minutes. The longer the stain sits the darker the stain penetrates. A penetrating stain can also be applied in which will increase this effect. We prefer wiping stain due to the control and shorter open time and ease of wiping. This stain coat is often a lighter stain with more of a primary tone (red, green, ect.). Allow to dry.
4. Very light sand at dark, blotchy areas. This is a delicate step. Too much and you are in trouble. We use worn out 220 blocks or 400 very fine blocks.
5. Second stain coat (second toner color). This stain will be the right color to allow subtle colors from the previous stain to show through, leaving a more briliant and complex wood grain. Follow directions as applying forst coat.
3. Dry 24 hours.
4. Apply 3 coats of solvent based sanding sealer (HVLP or air-assisted airless). Good sand after final coat (220).
5. Apply 3 coats of lacquer (HVLP or air-assisted airless).
6. Allow to dry. Fill nail holes with custom matched wood putty and wipe smooth. Stain pens and artist brushes can be used to seal the holes and help match the color.
7. Re-set and install hardware.

Restoring Wood – Hot Tub Project

It can be daunting when trying to decide which stain and finish product to use when staining or refurbishing wood. Not all products are created equal. Some are made for ease of application, others for ease of clean up and others for durability. Classes are taught on wood finishing and restoring that are equivalent to a full semester of undergraduate coursework.

Keeping the wood on your hot tub looking brilliant can be one of the easiest items in your home to maintain. Let it go too long and the moisture will tear apart your wood and discolor it black. Simply re-stain the wood every other year in order to keep the wood from drying out and being oxidized by the UV light . Due to the small surface area, using a top of the line product is cost effective. In a few words, lets not use a penetrating stain. Coat after coat of penetrating stain will continue to darken the wood and saturate the wood, thus causing the wood to further degrade. Most penetrating stains are loaded with solvents that evaporate instantly. The cheaper stains contain very little of the compounds needed to reflect UV, thus allowing for faster penetrating of water and additional UV.

Instead of using a penetrating stain, try using a hard clear coat, film forming urethane /stain blend that will do wonders for any type of smooth wood in your home. Not all surfaces are designed for this hybrid stain. A hot tub fits the bill perfectly!


Sikkens – Door and Window – Sikkens makes stain products that time after time stand up to the elements and are rated top of the line for industry standards. Choose a tint color after preparing the wood and finish with the clear color. Future coats for maintenence – use clear. For additional protection a Spar Urethane can be used at very light and multiple building coats. If you want to get serious about it…Sikkens makes a Marine Urethane that is at the upper eschelon of marine coatings, as well as a marine coating for teaks and exotic hardwoods. Okay, maybe I got a little carried away, we are talking hot tubs here, not a hand carved teak boat.


Gel Staining (Glazing) to Darken Wood Cabinets or Doors

Is Darkening the tone or shade of wood without stripping down to bare wood possible? Yes it is. 

There are many methods to go about this process. When consulting with clients there are two essential factors.

1. How much wood needs a color change?

2. What is the severity of color change?

Let’s look at a small area first. Maybe a front door, a decorative sill, small piece of furniture, or a few cabinets. If the color is not too drastic of a change, let’s say we currently have a provencial tone and want to darken the wood to a light oak or darker provencial color. This can be accomplished with a gel stain in most cases. Gel stains are highly pigmented stains that take some time to learn to use (we will go throught this shortly). Here are the necessary steps:

GEL STAINING-Small Areas to subtle color change

Preperation Steps – Always cover floors, furniture and areas around work area. Ventilate area as we are working with solvent based materials and use fans as needed. Follow all label safety instructions. Always store solvent based rags in a tightly closed water container – they can easily combust.

1) Wash all wood with a TSP solution, xylene or a strong solvent cleaner. We tend to use xylene as it seems to be the most effective means to removing human oils, waxes from cleaning and dirt and debris. Sometimes a mild scour pad helps. 2) Scuff Wood with a 220 grit sandpaper always with the grain, not against. and wipe clean with mineral spirits and allow to dry for a few minutes. 3) Look for Damaged Wood and areas where the finish is gone or the wood has changed color. Even minor nicks and dings need attention here. These areas will need to be cleaned with a wood brightener, sanded and cleaned to remove all oxidized and water damaged wood. 4) These areas need to be sealed with a sanding sealer, clear shellac or polyurethane. Which ever product was used previously is best to assure adhesion. If wood is very damaged further steps may need to be taken.

Staining – Have rags , mineral spirits, a water bucket for the used rags and an empty cut bucket near by to place your brush in when working with the stain.

1) Practice – Using a very nice and soft ox hair brush or a china bristle brush is essential. Apply the gel stain in sections, while wiping adjacent areas with a clean rag. Keep in mind, the more coats applied the darker this material becomes. Work slowly and keep in mind lighter is better than darker as additional coats can be added. Let your sample/practice piece dry as to see the true final color. It is best to practice on something with the same type of millwork, corners, adjacent edges, ect. Practice some more and do not over apply. Practice some more. Wash brush very well with spirits changing the spirits three times during washing. After ample practicing…it’s time to start. If you are feeling nervous practice more.

 Techniques – My favorite brush to use is a slightly worn out, very soft and very clean natural ox hair brush. A brush no more than 2 inches. A few different widths of brushes are nice to have handy. Let’s say we are staining a handrail from a golden oak to a light oak (yellow/orange to a light brown). All prep work and masking are complete. I’ll start on the left rail going up the stair well ( don’t choose too large of a section as the stain can start to dry and get tacky). Apply stain in strategic sections and at the praticed amount of stain to get the desired color.  Applying less stain where sections meet (baluster meets rail). I will wipe the brush almost dry after applying the stain to the wood section. Work the stain with the grain using your clean brush. You may need to re-clean the rag, as it picks up additional stain (did you practice?) Keep in mind lighter is better than darker. When moving on to the next section, choose a section where the stain is dry at the adjacent areas.

Gel stain is intended for use on making wood millwork and decorative sections stand out darker than the flat surfaces. The outcome is very nice with an old world, distressed and aged look. Gel stain can also be used on larger surfaces at smaller quantities to slightly darken a tone or hue of wood. Many cabinet finishers and glazers will also use gel stain as a way to very subtly darken the deep grains only. This is accomplished by brushing the gel stain across the grain and removing completely with a rag. It is a very finite detail high end cabinet finishes.

Gel stain can also be used as described above to give a full change in color. This is NOT SUGGESTED on very large areas or on a large volume of wood as it can be too tedious and come out looking brushed and faux like. Unless this is what you are looking for,  there are additional options to re-finishing wood to a darker color (see fogging below). A full change in color can take multiple coats brushed out miticulously. It takes a detailed and experienced eye and hand to complete a set of cabinets, stair rail or a door to a good finish.

To Darken larger areas – See the Fogging Wood blog. An advanced spray technique designed for experienced finishers.